Axolotl Tank Setup: What Most Beginners Get Wrong
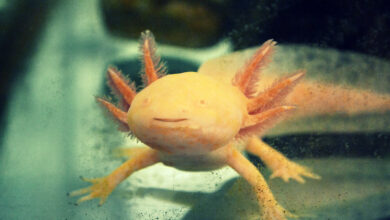
The axolotl was belly-up at 6:43 a.m. on a Tuesday. Not dead — just stressed, floating sideways near the surface while the filter churned the water into something resembling a river rapid. The owner had spent $340 on the tank, the lid, the thermometer, and a bag of gravel from the pet store. The gravel was the problem. So was the filter. And, honestly, so was the water temperature, which had crept up to 74°F over the previous week without anyone noticing.
Here’s the thing most beginner guides won’t say directly: the axolotl tank hobby has a dropout rate that would embarrass a CrossFit gym. Most people lose their first axolotl within three months. Not because they don’t care — they care obsessively — but because the setup advice circulating online optimizes for looking right rather than working right. A tank that photographs beautifully for Reddit can be a slow death trap for a salamander that evolved in a high-altitude lake in Mexico. The problem isn’t beginner ignorance. It’s beginner misinformation dressed up as expertise.
1. The Temperature Problem Is More Serious Than Anyone Tells You
Axolotls are cold-water animals. Full stop. They come from Lake Xochimilco — what’s left of it — in the Valley of Mexico, sitting at roughly 7,200 feet above sea level. The water there runs cold. Your living room in July does not.
The target range is 60°F to 68°F. Some keepers push it to 70°F for short windows and get away with it. Above 72°F, you’re looking at heat stress. Above 75°F, you’re watching an animal slowly shut down — reduced appetite, fungal infections blooming on the gills, lethargy that looks like personality but is actually organ stress.
I’ve talked to keepers who ran their tanks at 73°F for months and swore their axolotl was “totally fine.” Then one summer heat wave pushed it to 76°F for five days, and the animal didn’t recover. The margin for error is thinner than people realize.
Practical fix: A small aquarium chiller — the kind designed for nano tanks — costs somewhere between $80 and $150 used, and it is the single most important piece of equipment in a warm climate. If you’re in Phoenix or Houston, this isn’t optional. Frozen water bottles work as a temporary buffer, but you’ll need to swap them every few hours, which is not sustainable. Buy the chiller.
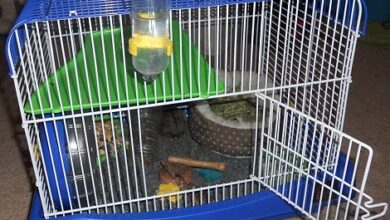
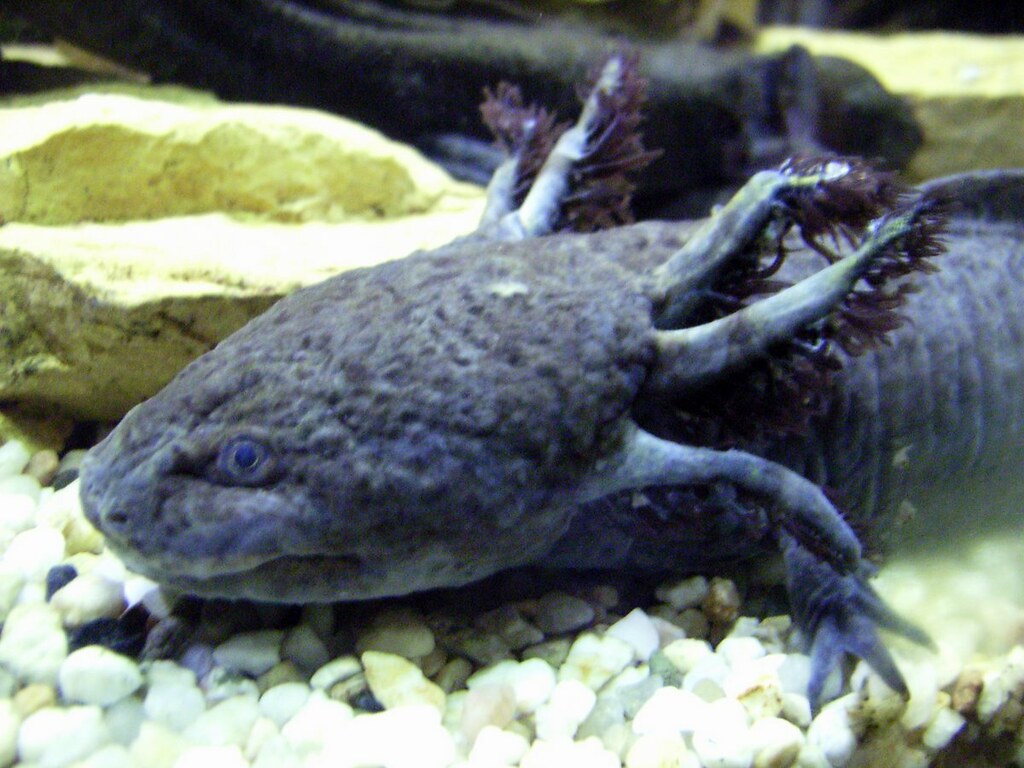
2. Gravel Is Not Substrate — It’s a Hazard
The pet store sells gravel because it looks nice and it’s cheap to stock. It is actively dangerous for axolotls. These animals are ambush feeders with poor eyesight; they inhale food by suction and frequently ingest whatever is nearby. Gravel pieces — anything smaller than the axolotl’s head — can be swallowed, cause impaction, and kill the animal. This is documented in veterinary literature on amphibian care, and it’s still the number-one substrate sold to new axolotl owners at chain pet stores.
Your options are: bare bottom (easy to clean, looks stark), fine sand (pool filter sand works well and costs around $8 for a 50-pound bag at hardware stores), or large-grade slate tiles (expensive but beautiful and completely safe). Most experienced keepers land on fine sand. It’s natural-looking, easy for the axolotl to walk on, and if ingested, passes without issue.
The bare-bottom approach is popular for quarantine tanks or hospital setups, but axolotls are more active and seem less stressed with some texture underfoot. Sand wins on almost every practical measure.
3. Tank Size: Where the Math Goes Wrong
You’ll see “20 gallons minimum” repeated everywhere. That number is technically accurate for a single adult axolotl, but it’s the floor, not the goal. A 20-gallon long — not a 20-gallon tall — is the actual minimum, because axolotls are bottom dwellers. They don’t use vertical space. They pace the footprint of the tank.
A 20-gallon tall tank has a smaller base than a 20-gallon long. An axolotl in a 20-gallon tall is cramped in the dimension that actually matters. This distinction rarely makes it into beginner guides, but it’s the difference between an animal that can turn around comfortably and one that’s constantly bumping into glass.
For two axolotls — which is a common setup — go to 40 gallons. Axolotls are not particularly social; they tolerate cohabitation but they also nip at each other’s gills, especially during feeding. More space reduces that behavior significantly. If you’re committed to keeping two, 40 gallons gives both animals enough territory to establish loose zones and reduces stress-related aggression.
4. Filtration: Too Much Flow Kills the Vibe (and the Animal)
This one took me a while to understand. New keepers often over-filter — they buy the highest GPH (gallons per hour) filter rated for their tank size, thinking more filtration equals better water quality. What they get instead is a current-heavy tank that exhausts the axolotl.
Axolotls live in slow-moving or still water. A filter pushing strong flow across the entire tank forces them to swim against current constantly — it’s like making someone jog on a treadmill that never turns off. Over time, this causes chronic stress, which suppresses immune function, which opens the door to bacterial and fungal infections.
The fix is twofold. First, choose a filter rated for roughly 2x to 3x your tank volume per hour — not 5x or 10x, which is appropriate for fish but not axolotls. Second, baffle the output. A common hack is to fill a plastic bottle with filter media and attach it to the output nozzle to diffuse the flow. Some keepers use a spray bar. Either works. The goal is gentle, even circulation — not a river.
Sponge filters powered by an air pump are genuinely excellent for axolotl tanks and cost almost nothing. They’re gentle, they colonize beneficial bacteria well, and they’re easy to clean. If you’re setting up a tank under 30 gallons, a sponge filter is probably your best option.
5. The Nitrogen Cycle Is Not Optional — But Most People Skip It
Industry surveys and hobbyist community data consistently show that a large percentage of new aquarium keepers add fish — or in this case, axolotls — to a tank that hasn’t completed its nitrogen cycle. The result is “new tank syndrome”: ammonia spikes, followed by nitrite spikes, followed by a sick or dead animal.
The nitrogen cycle establishes colonies of beneficial bacteria (primarily Nitrosomonas and Nitrobacter species) that convert toxic ammonia from waste into nitrite, then into the far less toxic nitrate. This process takes four to six weeks in a new tank with no shortcuts. You can accelerate it by adding bottled bacterial cultures — products for this purpose are widely available at pet stores — or by seeding the tank with established filter media from a healthy tank.
Testing matters here. A liquid test kit (not the strip tests, which are notoriously inaccurate) will show you exactly where your cycle stands. Target: ammonia at 0 ppm, nitrite at 0 ppm, nitrate below 20 ppm. Don’t put an axolotl in the tank until you hit those numbers and hold them for at least a week.
I know a keeper in Colorado who cycled her tank for eight weeks before adding her axolotl. Eight weeks of patience. Her axolotl is now four years old and still going strong. That’s not a coincidence.
6. What Does Not Work (And Why People Keep Trying)
Let’s be direct about a few common approaches that consistently fail:
- Keeping axolotls with tropical fish. Tropical fish require temperatures of 74°F and above. Axolotls thrive below 68°F. These two requirements are physically incompatible. You will either stress the axolotl, stress the fish, or stress both. The “I’ve done it fine” anecdotes exist, but they rely on luck and imprecision in measurement. It’s not a sustainable setup.
- Using tap water without dechlorination. Municipal tap water in most U.S. cities contains chlorine and chloramines. Chloramines, specifically, don’t evaporate out like chlorine does — they require a water conditioner to neutralize. Skipping this step damages gill tissue and degrades water quality faster than most beginners expect.
- Decorating with sharp or porous objects. Axolotls have delicate, feathery external gills and permeable skin. Driftwood with rough edges, sharp plastic decorations, or highly porous rock can abrade their gills or harbor bacteria that’s difficult to eliminate. Smooth, aquarium-safe resin hides and flat stones are the better choice.
- Feeding exclusively pellets from day one. Pellets are convenient, but many axolotls — especially juveniles — won’t recognize them as food initially. Worms (earthworms, blackworms) are more instinctually triggering because they move. Starting with live or frozen worms and transitioning to pellets over time works far better than assuming the axolotl will immediately accept a sinking pellet sitting motionless on the sand.
7. A Real Before-and-After: Six Weeks of Getting It Right
A keeper I know — someone who came into this hobby through her daughter’s fascination with the Minecraft axolotl — set up her first tank in September with gravel, a HOB filter running at full blast, and tap water she conditioned once and then forgot about. By week three, her axolotl had white, fuzzy patches on both gills. Classic columnaris or fungal infection, driven by stress and poor water quality.
Week four: she stripped the tank. Replaced gravel with pool filter sand. Baffled the filter output with a cut-up water bottle and zip ties. Started testing water every other day with a liquid kit. Added a small fan to blow across the water surface — not a chiller, but enough to drop the temperature 2°F in her air-conditioned house. Got ammonia to zero.
By week six, the gill tufts had regrown almost completely. The axolotl — a leucistic named Dumpling — started eating earthworm pieces from tongs without hesitation. It wasn’t a clean process. She over-treated the fungal infection with a salt bath that stressed Dumpling further before she dialed back the concentration. She also knocked the thermometer into the tank at 11 p.m. and had a minor panic. But the overall trajectory was right, and the corrections were small enough to manage.
That’s what a realistic recovery looks like. Not perfect. Correctable.
8. Lighting, Hides, and the Stuff That Actually Matters for Stress Reduction
Axolotls have no eyelids and are sensitive to bright light. A heavily lit tank with nowhere to retreat is stressful. You don’t need elaborate lighting — in fact, low-to-moderate lighting is better. If you have live plants (which are great for water quality and axolotl enrichment), a low-wattage LED designed for low-light plants works well without blasting the animal.
Hides are non-negotiable. At minimum, two hides per axolotl — one on each end of the tank. PVC pipe sections, smooth ceramic pots, aquarium-safe resin caves. The axolotl needs to feel like it can disappear. When it can’t, it’s stressed. When it’s stressed, its immune system weakens. You know how this ends.
Live plants like java fern, anubias, and hornwort do well in cold water and low light. They absorb nitrates, provide cover, and give the tank a look that doesn’t require a design degree to achieve. Hornwort in particular is nearly indestructible and helps buffer temperature swings slightly by adding thermal mass to the water volume.
Where to Start This Week
If you don’t have the tank yet: buy the 40-gallon long before you buy anything else. Everything else fits around it. Start the nitrogen cycle before you even think about ordering an axolotl.
If you already have a tank running: test the water today — ammonia, nitrite, nitrate, temperature. Write the numbers down. If ammonia is above 0.25 ppm or temperature is above 70°F, those are the two problems to fix before anything else. Everything else is secondary.
If you already have an axolotl showing signs of stress — reduced appetite, floating, gill degradation — do a 20% water change with dechlorinated, temperature-matched water today. Not tomorrow. That one action buys time while you diagnose the underlying issue.
Small moves, done consistently, are what keep these animals alive. The keepers who succeed aren’t the ones who buy the most equipment. They’re the ones who test their water on a Tuesday at 6:43 a.m. and actually look at what the numbers say.